

Wall lights can add an attractive feature to a room and are not difficult to fit, the only hard bit is making good as you will have to make the plaster good once you have routed the wires to the switch and the wall lights.
| Before working on any electrical circuit you must ensure that it is isolated correctly and cannot accidentally be switched back on. Please read the article on safe isolation procedures before doing any electrical work. If you are not 100% certain what you are doing call a qualified electrician. Building regulations are changing all the time and modifying your home electrics could be against new rules and could invalidate your home insurance, if in doubt check first! |
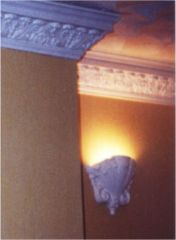
This up lighter above is one of a pair and are fitted either side of a chimney breast, these were fit before the Plasterboard and coving were installed.
The first job is to decide exactly where you want the wall lights placing, often they are placed each side of a chimney breast or in a alcove. If there is decorative Coving above where you require the wall lights then it may be easier to feed the wires from The floor (providing it is not a solid floor), this would make the job considerably more difficult as there probably will not be a Lighting circuit wire in the vicinity which will mean fitting a Fused connection unit to the ring main to feed the lights. In most cases it is possible to route the wire behind the decorative coving without damaging it.
Mark out and Fit the back boxes for the Wall lights, Chase out the plaster to the ceiling and remove the floor boards directly above where the wires are going to be fed, Using a masonry drill on slow speed drill a 10mm Hole through the ceiling until you have an hole suitable for feeding the wire down to the Back box.
You can get the supply for the wall lights from a nearby ceiling rose or junction box from the lighting circuit, you now need to wire the lights depending on which type of lights you have as some lights have a built in on/off switch which means you can simply take a Live, neutral and earth (in the one cable) to the new wall lights or you can wire them up via a wall switch which is the preferred method.
When routing the cable it must be in the permitted wiring zones
Before touching anything electrical you must follow the Safe isolation procedures
For wiring up the new lights please see the following articles-
lighting circuits | Light wiring diagrams
If you simply need to replace existing wall lights please see this video- replacing wall lights