

Here we are fitting a towel radiator to a solid wall-
If you are fixing a towel radiator to a stud wall it is recommended that it is fastened to the studs or noggins, unless you use a suitable plasterboard fixing.

This is the towel radiator that we will be fitting to the wall. Firstly we need to get in in the correct position and then we need to set it at the correct height. When determining the height remember to allow for the valves that will protrude from the bottom.
The radiator fixings for this radiator are made from chrome coloured plastic and come in two parts, one part fastens to the wall and the other to the radiator, the one on the radiator then slides inside of the one fixed to the wall and is held by a retaining screw. Strangely this towel rail comes with three fixings and so we are going to place two at the top (one in each corner) and one at the bottom in the centre.
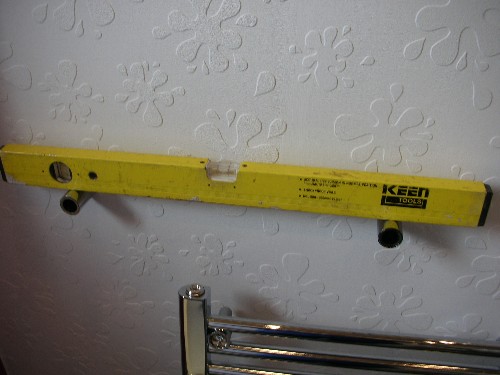
Fit the two chrome plastic male fittings to the radiator, you can see one in the left of this picture. Then slide the female fittings over the male fittings and then mark the position on the wall, ensure that the two fittings are straight by using a spirit level. How to fit the female part of the fixings is described below.

Mark the position where the female part of the fixing will be fastened to the wall and then drill a hole with a masonry drill bit and insert the plug.
Push the screw which is supplied through the washer and then through the end of the female fitting and screw it to the wall.
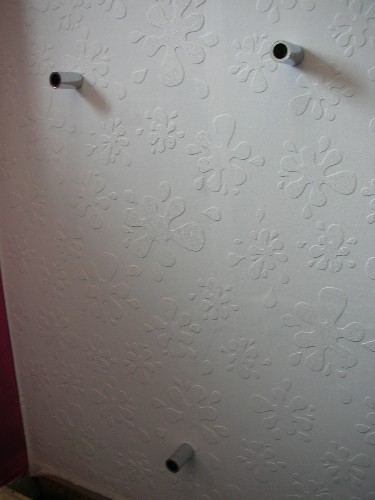
Here you can see that all three fixings are firmly fastened to the wall.

Tighten the retaining screw, which holds the radiator male fixings to the female wall fixings.
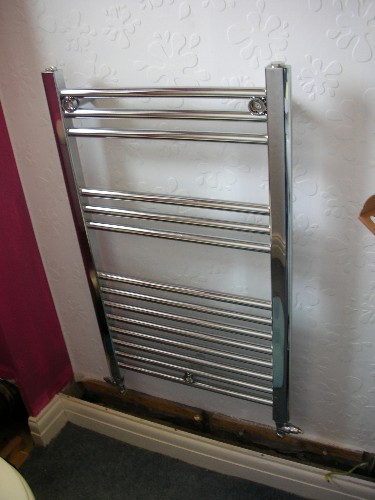
This is the radiator that has been fixed to the wall, plastic caps will be fitted later to cover the three exposed screws at the front. This radiator can now be piped up.