

Reasons for Pipe bending rather then using joints:
1. Water flow – Estimated that a 90 degree elbow in a pipe is equal to adding 0.5M of pipe work in terms of added resistance. Using a 90 degree radial bend is equal to adding 0.3M of added resistance. Add up all the bends in a pipe run, and the reduction in resistance becomes significant
2. Joint Failure – a mechanical join between any two parts introduces a potential point of failure. Using a bend in a pipe rather then an elbow reduces the joint count and therefore reduces the number of potential points of failure. Additionally, by eliminating joins in inaccessible places, it also reduces the possible need of disruptive associated works to rectify e.g. possible removal of a bath or false walls to repair a failed joint.
3. Cost – both in terms of time and materials, pipe bending can save. By using a simple single 90 degree bend, instead of two pieces of pipe and an elbow, the cost of the elbow is saved (between £0.25 and £2.00 depending on elbow used); and the time spend preparing the surfaces to be joined and making the joint is saved.
4. Flexibility of runs – typically 90 degree elbows are used for changing a direction of a run to change directions or to avoid obstacles. Bending pipe will allow you to make an angle from anywhere from 0 degrees to approximately 135 degrees. If multiple 90 degree elbows are used, all the above points apply multiple time, but with a pipe bend, it is possible to circumvent obstacles and multiple direction changes in one piece of pipe.
There are some downsides to bending pipes:
1. The bends are typically approximately 7cm radius as opposed to a radius of 1.5cm on an elbow – so if room for the pipe is very tight, a bend may not fit and an elbow must be used.
2. The action of bending the pipe distorts the 'roundness' of the pipe slightly and this distortion actually extends around 1-2cm from the end of the bend – this means that if a connection is needed straight after the bend ends, there may not be enough 'round' pipe to connect a fitting to (this is especially the case with compression fittings)
Using Pipe Benders
It is possible to bend pipe with an internal spring, or over a knee or some other cylindrical object, but it is much easier to use Pipe Benders.
The most common type are probably the "Heavy Duty" Pipe Benders and these are setup to bend both 15mm and 22mm copper pipe – they will also often be capable of bending 15mm stainless steel tube.
The pipe benders come with a paid of guides (or formers) that are used to keep the profile of the pipe round as it is bent – not using these will result in a bent, but flattened pipe!
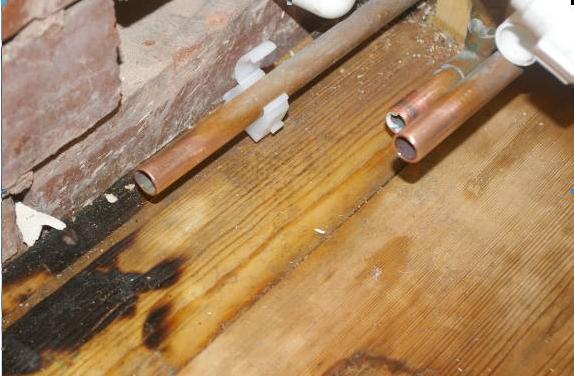
There will be a cold supply required to reconnect to both the pipe at the left (toilet cistern) and pipe at the right (basin) in the picture below for this bathroom refit. Now it would be very simple to use two bits of tube and an elbow, but even easier to bend an off-cut of copper tube to suit as well.
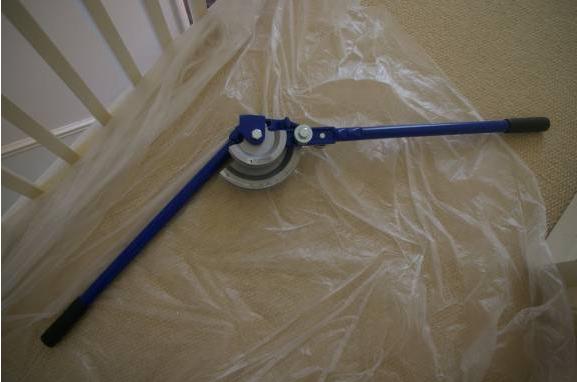
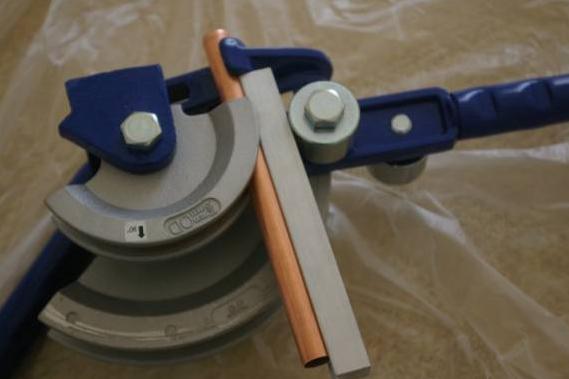
Step 1 – Open up the pipe benders as shown
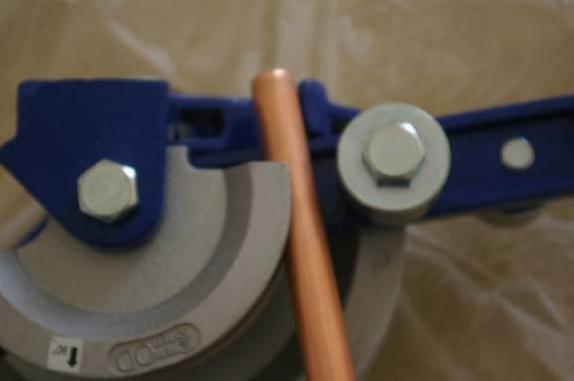
Step 2 – Push in your piece of copper tube off-cut

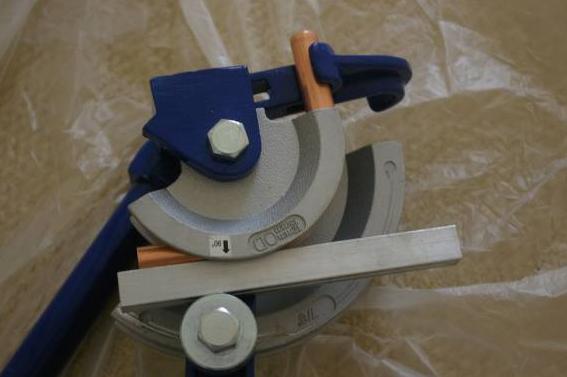
Step 3 – Push the pipe into the bender slot and then rotate the pipe clamp over the end Note – this clamp can slightly distort the roundness of the tube, so always extend the pipe a little way out.
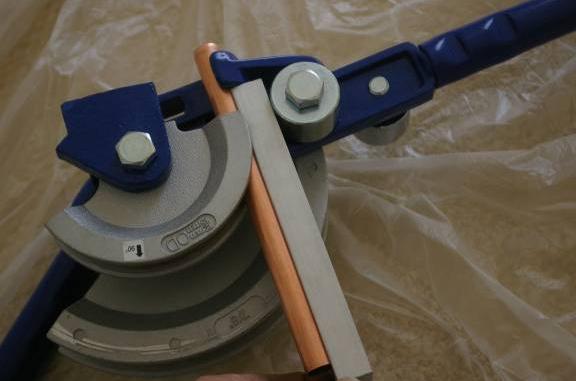
Step 4 – Place the former in the bender as shown. With the Pipe Bender arm in the position shown, the pipe is still free to move around and this is the time to make final adjustments to position
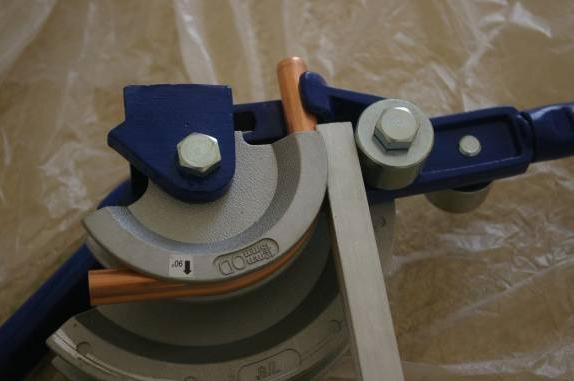
Step 5 – move the arm of the bender down (away from the clamp) slightly This now puts the whole setup in tension and the pipe is now firmly positioned ready to be bent. This is now your last opportunity to check the position of the pipe – and if this were a pipe with multiple bends, to make sure this bend will be going the right way!
Step 6 – pull the right arm firmly down. This has now bend the pipe as can be seen – there is a 90 degree mark on this pipe bender, so if 90 degrees is the requirement, simply sweep the arm across until the arm is in line with the marker.
Step 7 – Return the arm to the original position
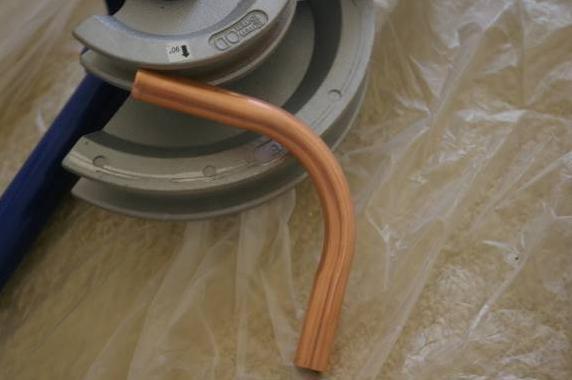
Step 8 – remove the former, release the tube from the pipe bend channel and drop the pipe clamp . And you have your bent pipe ready to be offered up and cut to fit. This pipe bending operation would probably take around 30 seconds to do start to finish
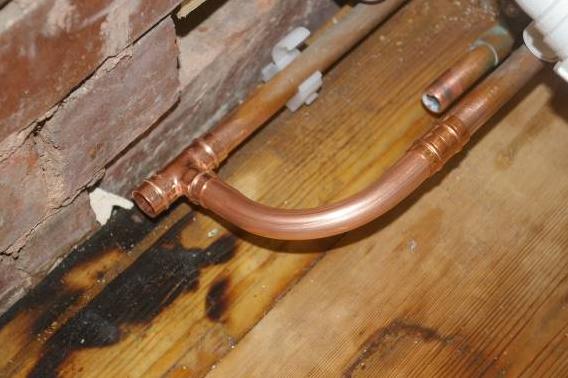
Bent Pipe trimmed to size and ready to be soldered