

A cordless drill is an essential piece of equipment and no self respecting DIY'er should be without one. Drills vary enormously in price and features but even a moderately priced cordless drill will have useful features.
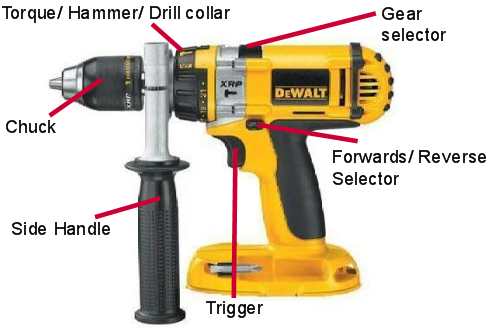
This is the DW988 18 volt cordless combination drill
In the picture above I have listed all of the parts of importance, we will look at these in detail Below.
NEVER CHANGE DIRECTION WHILST THE DRILL IS STILL MOVING AND DO NOT CHANGE GEAR OR CHANGE THE TORQUE COLLAR UNTIL THE DRILL HAS COMPLETELY STOPPED!
- When drilling any material it is important that the drill is turning in the correct direction which is clockwise!
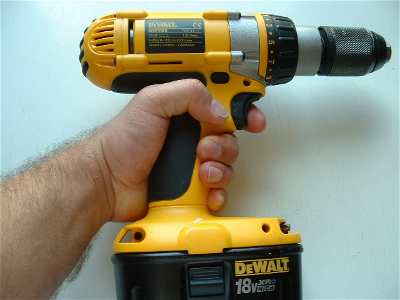
Drills can be used in either hand, the hand should wrap around the handle and the forefinger should be used to squeeze the trigger. Forwards or reverse can be selected by pushing the selector switch with either my thumb or forefinger.
The trigger (or switch) energises the motor and makes the drill turn, always squeeze it gently.
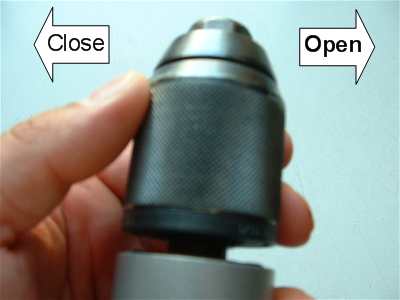
There are several different types of chuck but they are very much similar, this one is all metal and can be opened or closed with just one hand. Most chucks require two hands, one to hold the back of the chuck and the other to twist the body of the chuck.
This particular chuck opens by turning the body of the chuck clockwise and closes by turning it anti-clockwise. Always ensure that the chuck is tight as a loosely held bit can damage the chuck!
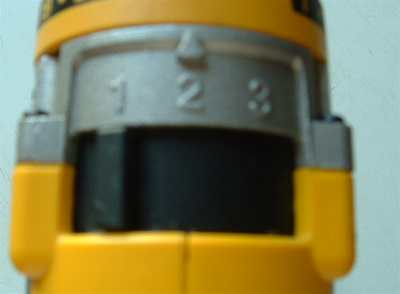
On the top of this drill is the gear selector lever, There are three gears (or speeds).
1. This is the slowest speed, but this has the highest amount of torque. This gear would be used for driving in large screws or drilling large diameter holes in metal.
2. Medium speed, this is between gear 1. and gear 3.
3. High speed, this gear is used for drilling small holes in metal etc.
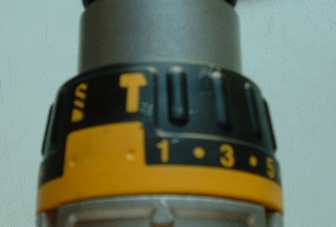
The torque / drill / hammer collar will be used frequently, this collar should be turned so that the pointer is pointing at what you would like to do. For drilling wood or metal turn it so that the pointer is on the drill symbol, for drilling masonry point it at the hammer symbol. The numbers represent Torque and will be demonstrated below.
Torque settings allow the drill to stop at a specified Torque, this is extremely useful when screwing plasterboard sheets to wood etc. as you can simply set the drill to the correct torque setting, this is normally trial and error. If the drill does not stop at the correct torque, let go of the trigger and move the collar to a lower number.

Torque setting 1, the drill stops when the screw is this far in.
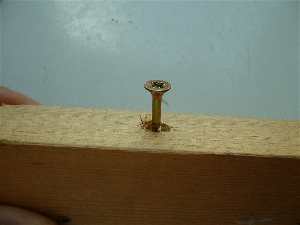
Torque setting 3, the drill stops when the screw is this far in.

Torque setting 7, the screw is all the way home!