

Here are step by step instructions on how to wire up a two way lighting circuit or to change a existing one way light switch to a two way system, this is very useful on stairs etc. as you can have a switch at the bottom and the top of the stairs.
| Before working on any electrical circuit you must ensure that it is isolated correctly and cannot accidentally be switched back on. Please read the article on safe isolation procedures before doing any electrical work. If you are not 100% certain what you are doing call a qualified electrician. Building regulations are changing all the time and modifying your home electrics could be against new rules and could invalidate your home insurance, if in doubt check first! |
Two way switching is not as difficult as it first seems and should be pretty straight forwards if you follow the diagrams below.
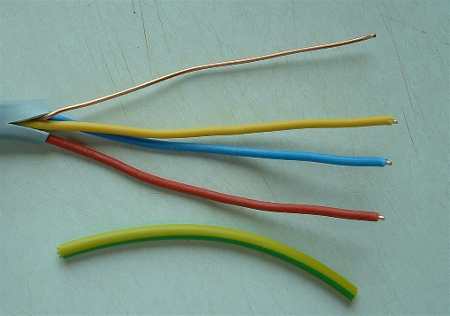
Earth wires have been omitted from all photo's and diagrams for clarity, but must be connected at all earth terminals. Two-way light switches are required for two way switching, these can be identified by looking at the terminals on the back of the switch . There will be a Com (common) terminal a L1 terminal and a L2 terminal.
Two way switching with the old wiring colours-

This diagram represents a two way switching arrangement. There are other ways of wiring a two way lighting circuit, but this is by far the most common and easiest method. The old wiring colours that are present in the majority of homes in the uk have been used for this diagram. Three core and earth cable is required to install two or three way switching and this should be run from the first light switch to the second and then wired as shown in this diagram. Switch one is the switch that contains the live wire and switched live wire. The diagram shows single colours only. In real life these wires would be covered by an outer protective sheath and would include a bare earth wire and would be called a cable. Red sleeving or tape would of been placed on the wires as shown to show that they would be live at some point. Now this sleeving would be brown. The connections are very simple and there is another guide further down this page.
Two way switching with the new harmonised colours-

This is the same diagram as above, but using the new harmonised colours. Three core and earth cable is required to install two or three way switching and this should be run from the first light switch to the second and then wired as shown in this diagram. Switch one is the switch that contains the live wire and switched live wire. The diagram shows single colours only. In real life these wires would be covered by an outer protective sheath and would include a bare earth wire and would be called a cable. Brown sleeving or tape would of been placed on the wires as shown to show that they would be live at some point.
How to convert a single switch to a two way system
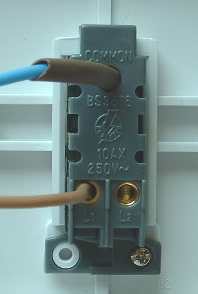
Here you can see the back of a light switch, in this instance it is a two way switch being used for a one way light. A one way switch has only a common and L1 terminal and a two way switch has a common, L1 and L2 terminal, like this one in the picture.
Note that new harmonised cable is being used (Brown and Blue) and note that Brown sleeving has been placed over the Blue wire, This signifies that it will be live at some point! The earth wire should always be connected to the earthing terminals, it has been removed for clarity here but must be connected, even on plastic light switches, unless there is no earthing terminal. The back box will need earthing unless it is plastic and there is no earthing point.
For two way switching you need a length of three core and earth cable long enough to reach from the existing light switch to the place where you intend placing the second light switch.
This cable needs routing via the easiest route, here are the guidelines and permissible zones permitted wiring zones
This is not the new harmonised cable so the colours may need changing, the earth sleeving still needs using before connection as with all cable.
There are no set rules for which wire does what in three way lighting, but I am going to use the most sensible option.

Remove the wire which is in the common terminal and place it in the L2 terminal.
These two wires are the permanent live and switched live wires.

There are no fixed regulations for which wire goes where but if you follow the colours that I have used here, they seem to make sense!
Note how all of the wires have brown sleeving on them! I have slid this back a little then you can see the actual colours of the wires. The brown wire and the blue wire that is sheathed brown are already in terminals L1 and L2, this is described above. These two wires are the Permanent live and switched live.
Old colours-
The Yellow wire goes in the common terminal, Red in the L1 terminal and Blue goes in the L2 terminal.
New colours-
The Grey wire goes in the common terminal, Brown in the L1 terminal and Black goes in the L2 terminal. When ever you fasten a wire into a terminal, always give it a gentle pull to ensure it is fastened correctly. This can save hours of work later on when the wire pops out and stops working!

This is the back of the second switch that will make the circuit 2 way, once again the brown sleeving has been slid back for clarity. The wires in this switch should mimic exactly the three wires that you have put in the other switch.
Old colours-
The Yellow wire goes in the common terminal, Red in the L1 terminal and Blue goes in the L2 terminal.
New colours-
The Grey wire goes in the common terminal, Brown in the L1 terminal and Black goes in the L2 terminal. You now have a light that can be switched on or off from 2 different locations.
The video guide of how to do this is here-