

Fitting a toilet syphon can be a time consuming job, hopefully these instructions will make the job much easier for anyone attempting to have a go themselves. Before replacing the syphon you should inspect the existing one as some syphon's are in two parts and can be split for servicing.
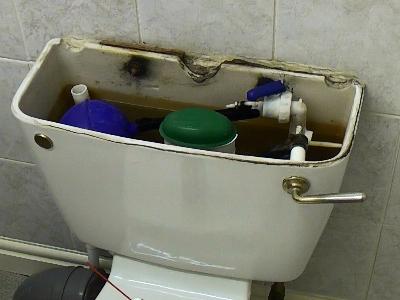
This is the toilet with the lid removed. Ensure you put the toilet lid in a safe place as they are easily broken! If you flush the toilet and occasionally it does not flush the first time this could mean that the syphon needs replacing. Firstly you need to isolate the water going to the toilet, this can be done locally via an isolation valve or by isolating the rising main
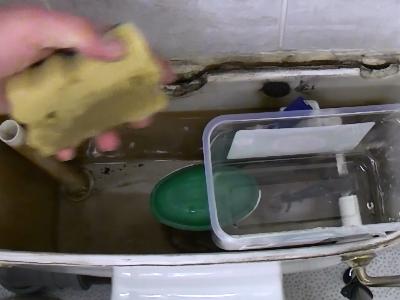
If the toilet still flushes give the handle a flush to empty the water out of the cistern. If the syphon is not working at all you need to ladle the water out using a suitable container. To get the last remaining water out of the bottom of the cistern you can use a sponge. Any water from the cistern can be emptied down the toilet pan.
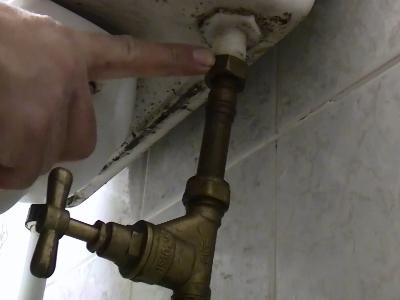
Use either the correct sized spanner or an adjustable spanner and undo the nut that connects to the water inlet valve ( some water will drip out on removal ). The overflow pipe will also need disconnecting (if there is one).

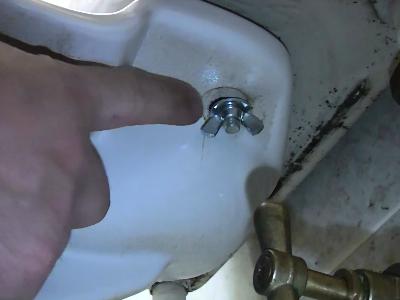
Underneath the toilet there are two wing nuts that hold the cistern to the pan, these need removing. If the nuts will not undo you can saw them off with an hacksaw or even cut them off using an angle grinder.
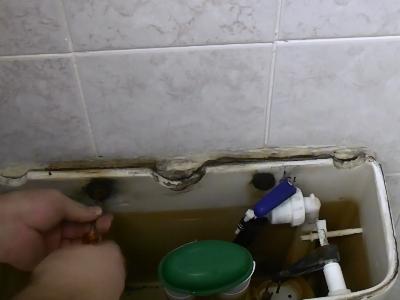
Undo any fixings that are holding the cistern to the wall, then carefully lift the cistern clear of the toilet pan. Clean any debris from the toilet pan where the cistern connects as any dirt can effect the seal later.
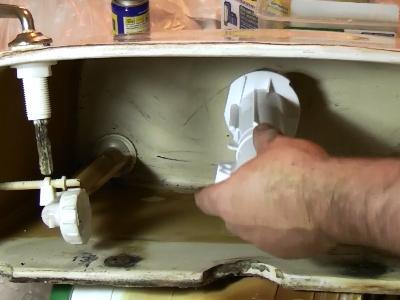
To make fitting the syphon easier you can split the water inlet valve. Now remove the C link that connects the lever to the Syphon.
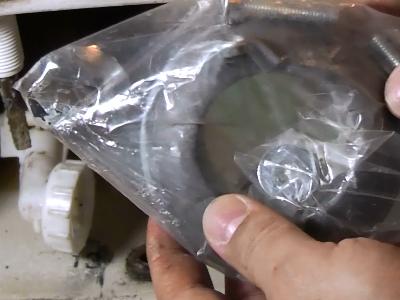
Obtain a new sealing kit for the toilet, this is necessary to refit the cistern back to the toilet pan.
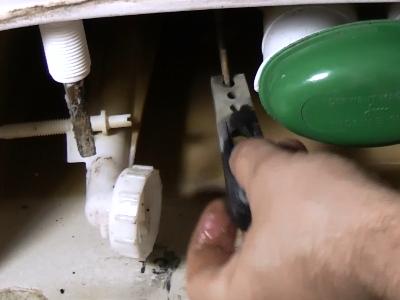
Remove the rubber donut washer, then Using water pump pliers undo the large nut at the bottom of the syphon. Remove the syphon from the cistern and clean it using a damp cloth. A clean cistern will ensure a good seal with the new syphon.
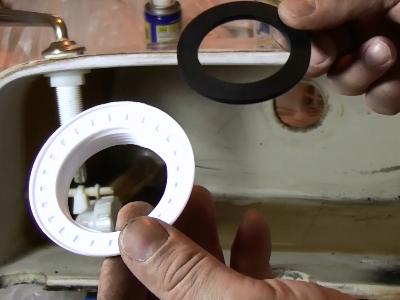
There will be a sealing washer and flanged nut with the syphon. DO NOT APPLY ANY SILICONE TO ANY SEALS!
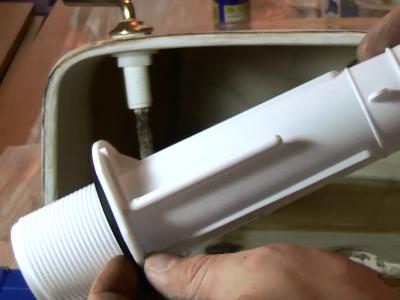
Slide the rubber washer over the threads on the syphon.
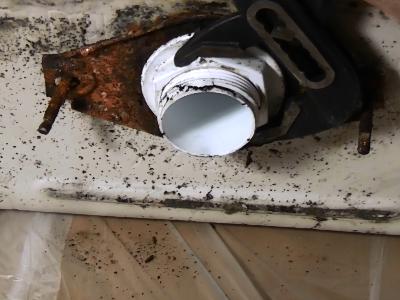
Insert the syphon into the cistern, then attach the bolt holding plate at the other side. This is a two part syphon, so it has been split into two. The other half will be screwed back on later.

Using a measure check to make sure that the bolt holding plate is straight ( this will make fitting it to the toilet pan easier later) Screw the flanged nut up to the bolt holding plate, then draw around the plate using a permanent marker, this is so that you will notice if the bolt holding plate moves during the tightening of the flanged nut.
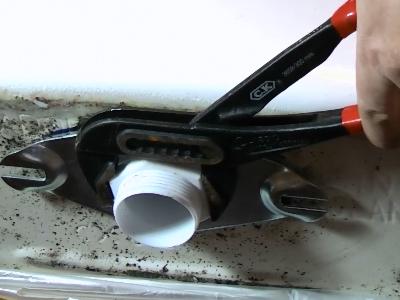
Tighten the nut using water pump pliers. The nut needs to be tight but don't apply too much force or you will crack the nut.
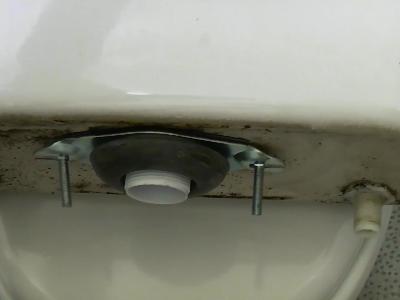
Push the new donut washer over the bottom of the syphon and slide the two bolts into the slots. Carefully place the cistern back onto the toilet pan.
Make sure any washers are placed on the bolts before the wing nuts, then tighten the wing nuts. Fix the cistern back to the wall ensuring and holes are sealed and cannot leak. Reconnect the water supply to the cistern and fill the cistern slowly whilst checking for leaks. Reconnect the overflow pipe (if there was one) Flush the toilet and check for leaks, then check for leaks some more.