

Here we are going to be fitting a waterfall tap. These instructions can also be followed for most basin taps that fit basins with a single hole. Whilst it is not impossible to fit a tap like this to the basin when the basin is fixed it is much easier to fit the tap with the basin removed from the wall.
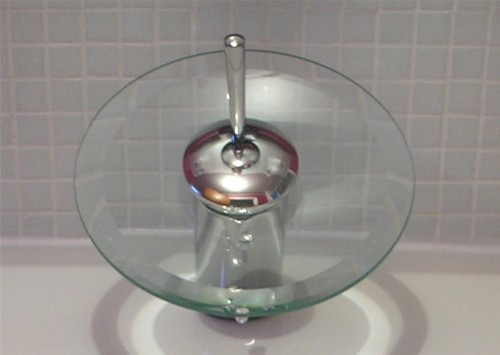
This is the waterfall tap that we are going to be fitting
If you are replacing an existing tap you may need to know how to Isolate the water supply
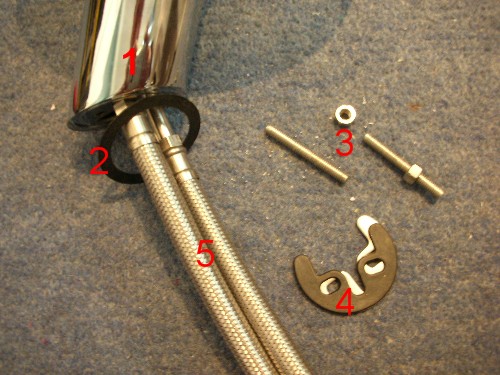
Here is the waterfall tap, It has come complete with the following items to enable fitting-
1.The waterfall tap body 2.The sealing ring for between the tap and the basin 3.Retaining screws and nuts 4.Horse shoe shaped steel washer and rubber washer 5.Flexi tails.
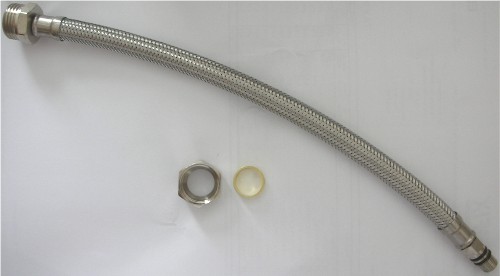
The flexi tails for this particular tap are 10mm at the threaded end and have two ptfe sealing rings. These simply screw into the base of the tap and are tightened using a small spanner.
The opposite side of the flexi tail will either have fittings so that it can be screwed directly onto an isolation valve (1/2 bsp thread) or will have an O ring and compression nut so that it can be compressed onto a 15mm pipe.

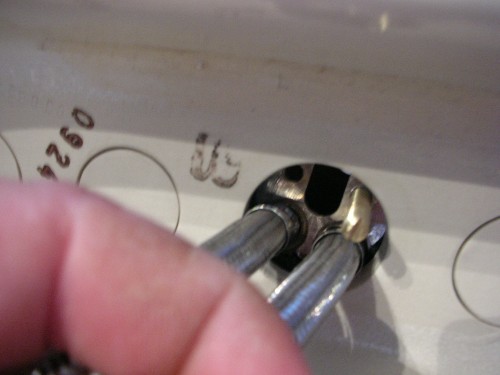
Screw the two flexi tails into the base of the tap ensuring that the two O rings are in position. Tighten the tails up in a clockwise direction using a small spanner. DO NOT OVERTIGHTEN!
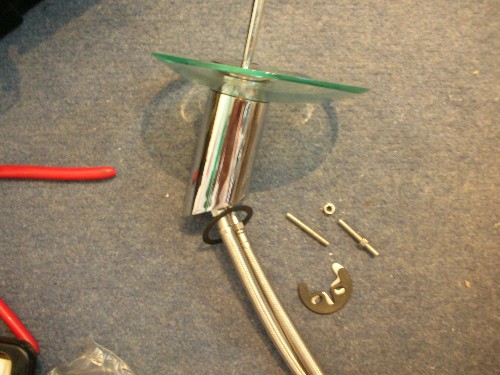
Now that the tails are screwed into the tap you can slide the rubber sealing ring over the tails and position it. The rubber ring fits between the base of the tap and the basin.
Feed the two flexi tails through the hole in the basin and then screw in the two screws using a screwdriver. You will notice that the screws are slotted on one end so that you can use a screwdriver.
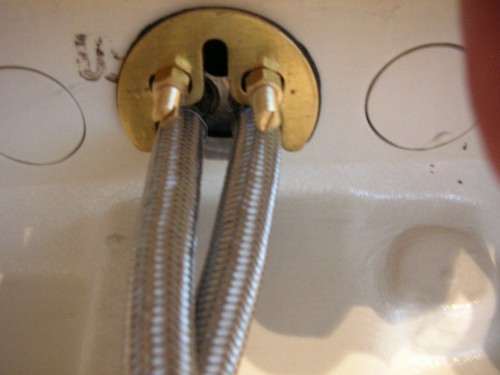
When both screws are in position slide up the rubber horse shoe shaped washer and the steel horse shoe shaped washer and then fix these in place by screwing up the two retaining nuts. Hold the screws in position with a screwdriver whilst tightening the nuts in a clockwise direction. Again do not over tighten the nuts.
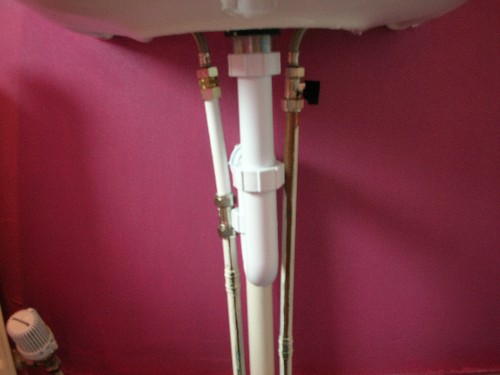
Now the tap is fixed you can connect it to the water supply. The hot and cold supply pipes should have isolation valves fitted, if not fitted already! A single check valve should also be fitted to the cold supply pipe as this kind of tap can cause cross contamination problems with some types of heating system.
Related articles- Isolation valve fitting | Joining pipes
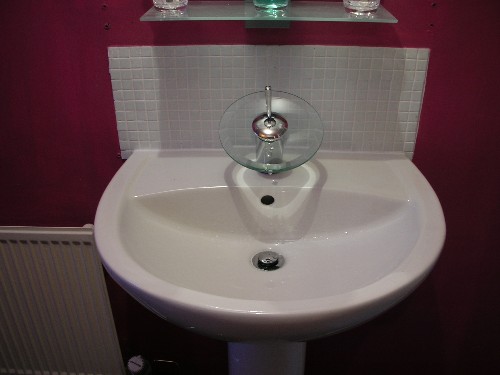
This is what the tap should look like once it has been fitted.