

Replacing a socket is normally quite easy as long as you follow certain safety precautions, sockets can easily be damaged and should be replaced at the earliest opportunity.
A damaged socket can be dangerous and can cause fires or serious injury or even death. If you have a socket that is damaged then it is essential that you do not use it until the socket has been replaced.
| Before working on any electrical circuit you must ensure that it is isolated correctly and cannot accidentally be switched back on. Please read the article on safe isolation procedures before doing any electrical work. If you are not 100% certain what you are doing call a qualified electrician. Building regulations are changing all the time and modifying your home electrics could be against new rules and could invalidate your home insurance, if in doubt check first! |

This socket was damaged when a bed was moved and caught the triple adaptor that was sticking out from the socket. This needs replacing immediately!
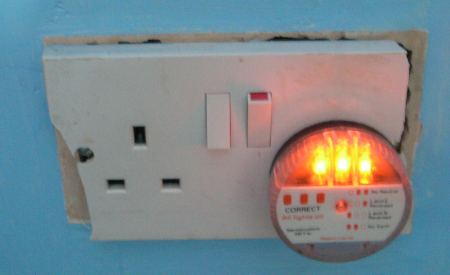
Here I have plugged in a socket tester to show that the socket is live. Now go to the consumer unit or fuse box and isolate the circuit, either by removing the fuse or switching off the circuit breaker. Ensure that no one else can restore the power!
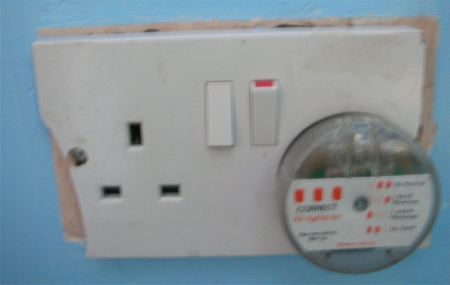
Now that the electricity has been isolated you can see that the socket tester is no longer illuminated.

Remove the two retaining screws for the front of the socket.
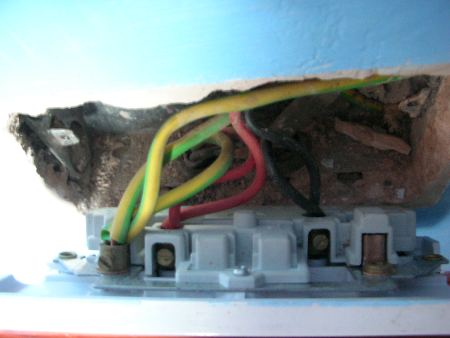
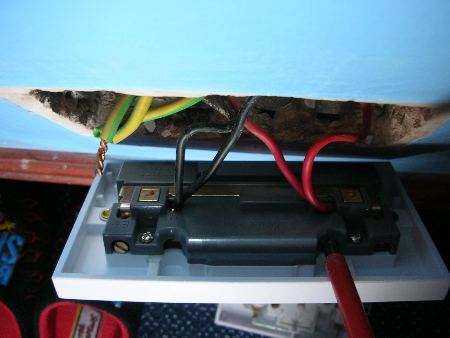
Gently pull the socket forwards and you will see the wires are connected in the respective terminals. Before proceeding any further you must now test each of the terminals using a GS 38 approved voltage tester, to make 100% certain that the electricity is isolated.
Click here to see more on safe isolation Check your new socket as it is quite likely that the terminals will be in different positions. Undo the screws with a suitable screwdriver by turning them anti-clockwise.
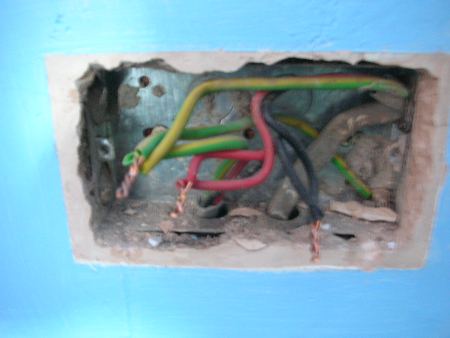
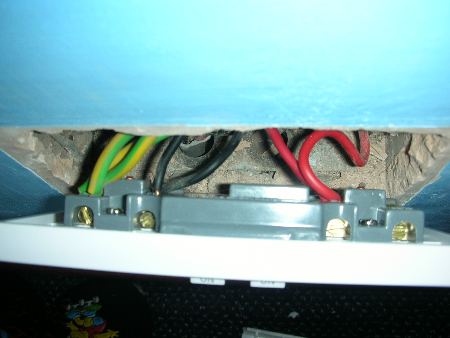
Remove the socket and check the positions of the terminals on the new socket. On our new socket the live and neutral terminals are in the opposite position to the old socket and so the neutral and live wires need to go into the correct terminals. se.
RED or BROWN wire(s) goes to L or Live
BLACK or BLUE wire(s) goes to N or Neutral
Ensure that the Earth wire- 1. goes from the supply and is supplementary bonded to the metal casing of the back box. 2. Is covered with Green and Yellow earth sleeving.
Reconnect the wires into the correct terminals and tighten the terminal screws by turning the screwdriver clockwise. The screws need to be tight but Do not over tighten the screws!
Once the terminal screws are tight grab the wires between your finger and thumb and try and pull them out, if you can the screws are not tight enough and you should re-tighten them.
Check that all wires are firmly in place before pushing the socket back into position. Ensure that non of the wires will become trapped when replacing the socket screws. Replace the two socket screws and again these need to be tight, but not too tight or you will crack the socket.
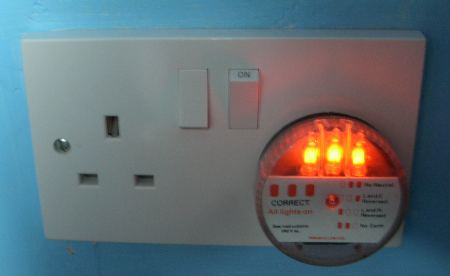
Restore the power to the socket circuit and test the socket with a socket tester.