

There are several methods to installing tongue & groove floorboards. Here is a step-by-step guide to installing them with the aid of a clamp (these can be hired from most tools hire stores for about £12-15/week). To lay the floor a minimum of two clamps are required. Depending on the width of the boards you will be laying, additional clamps may be required to obtain an evenly distributed clamping. A rough guide would be to use two clamps per 1.5M length of floorboard.
When you have purchased you floor boards, take them to the installation site and leave them in that room for about two days before you use them. If they have become wet at all then leave them longer before using them. This is to allow the wood to settle to your room temperature and is less likely to contract after installation.
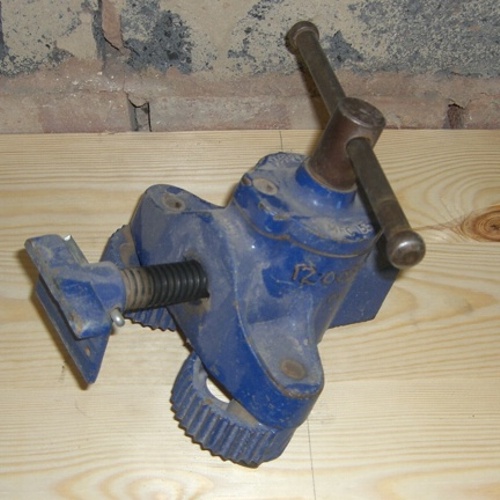
A Floor Board / Joist Clamp

The Clamp Fully Closed

The Clamp fully Open
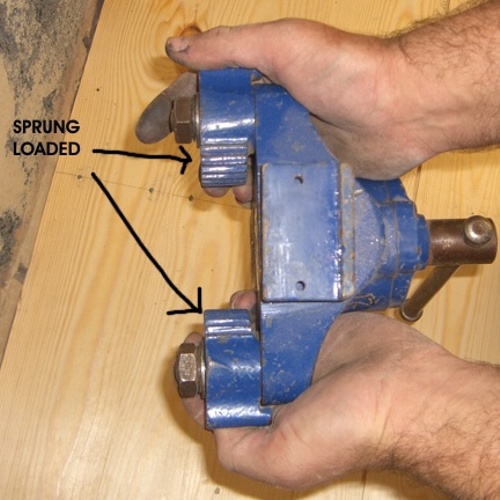
These two parts are the anchors that grip the joist under load. They are sprung loaded.
Simply lay the clamp flat onto the joist. Face the "L" shaped bracket to the floorboards you wish to clamp.
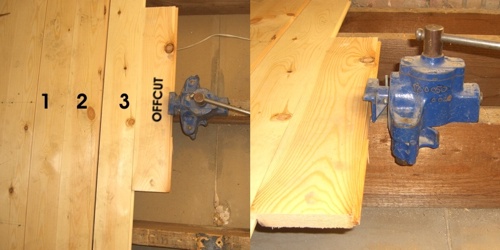
You can clamp each board individually or a maximum of three boards at the same time. If you prefer to install three at the same time, make sure you align the tongue & groove correctly as some boards may be slightly warped. When placing the boards on the joists, check that each board is laid down the same way, with the thinner side faced down (joist side) and the thicker side faced up. This produces a nice tight fit & alleviates the chances of your floor squeaking after a few weeks. Use two off cut pieces for the clamping. Lock them into the last board you have laid. See below for how to lay them with the clamp fully closed.
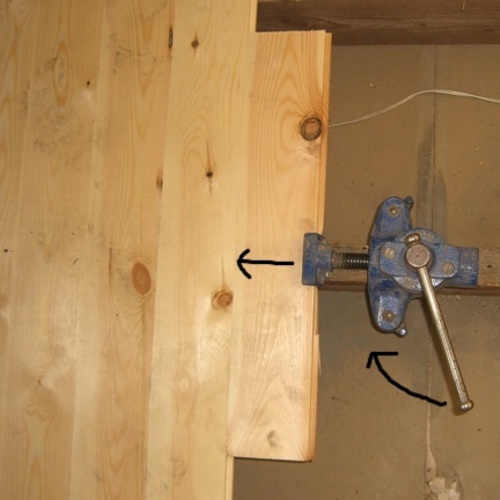
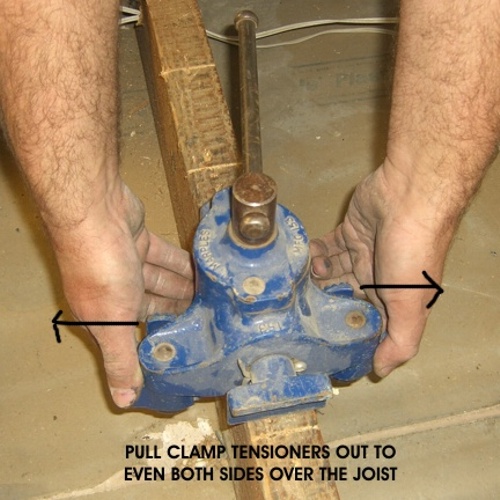
Now start to wind the vice outwards (direction shown in picture to left). Make sure you wind both clamps the same amount and try to wind them evenly i.e. wind one clamp a turn and then do the same to the other clamp. You may continue to wind until you have tightly compressed the new boards and the gap has disappeared to the eye. When this has happened, wind the clamps two more full turns. This should just (only just) start to lift up the edge of the last board that is closest to the clamp, if you are bowing the last board just slacken the clamps off a quarter turn.
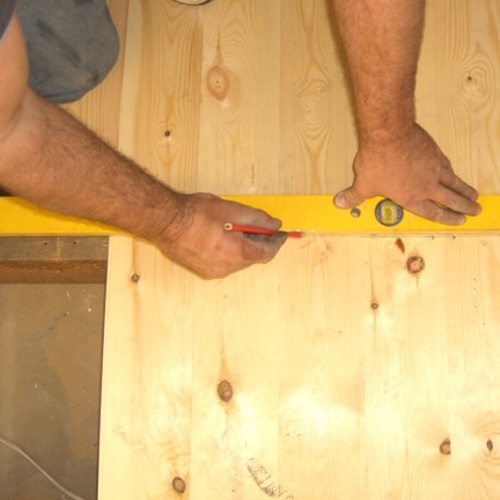
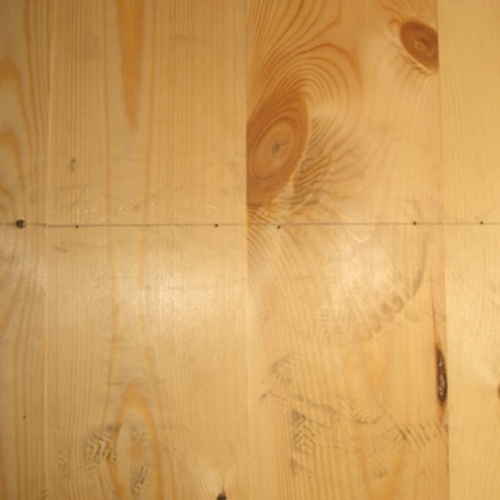
With the clamps still in place and the floorboards under tension, use something with a straight edge and mark a pencil line that cuts through the centre of the joist.
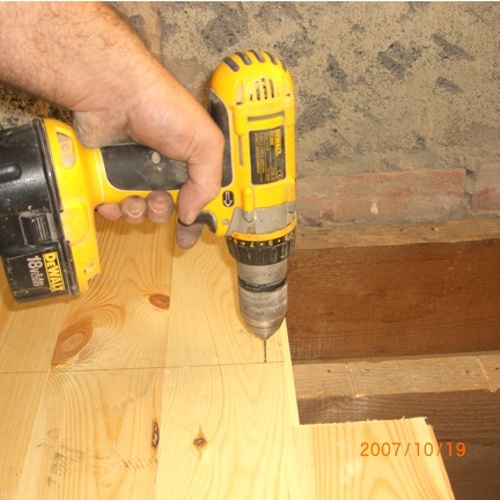
Using a drill and a 3.00mm wood drill bit, drill two pilot holes on each board at each joist section as shown here. Drill the holes on the outside of the board about 15-20mm from the outer edge. Always make sure there are no cables or pipes underneath before you drill.
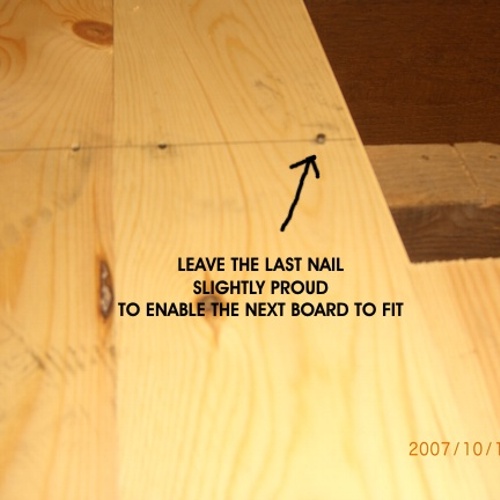
Leave the last nail slightly proud or it will make it difficult to get your next board to fit.
When you have all the floorboards in place, you can hammer down the final row of nails. As you can now see in the picture here, all of the boards are tightly butt up to each other.

If you would like to sand them to prepare for varnishing then follow the steps below: - For large areas you would be better hiring a standing one from a local store. For small areas, an industrial hand held "Belt" sander will suffice. When sanding with one of these machines, let the machine do the work. There is no need to lean on it to push it down. Also, when sanding wood, never belt sand across the grain of the wood, always sand in the same direction as the grain. It is advisable to use a dust bag attachment when using one (it is missing from the picture).
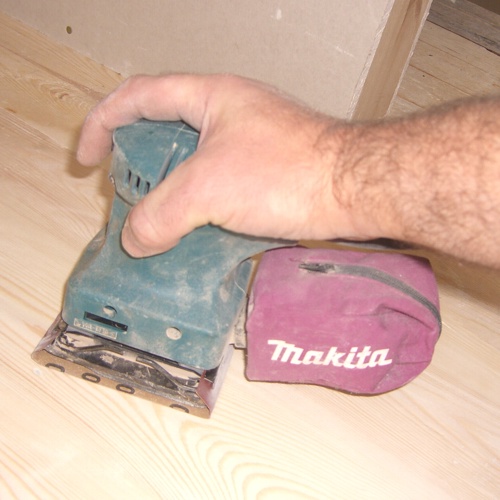
When you are satisfied that you have sanded out all of the rough / raised areas of the boards, you may then use a "Palm" sander. This machine will produce a very fine finish that feels like the wood has been polished.
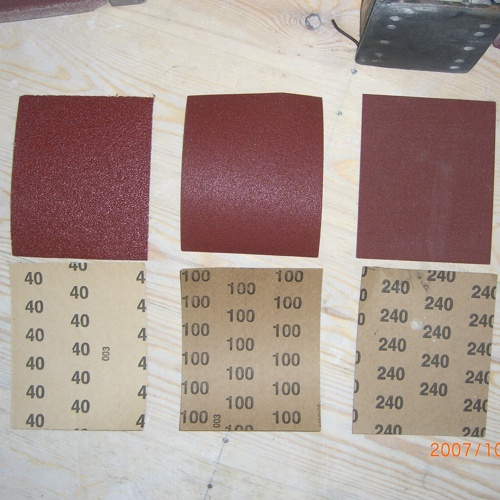
Again, depending on the starting surface of the wood, there are different grades of sandpaper one may use. With the fine grades of sandpaper (240 grit) you can let the sander move in any direction. When you have successfully sanded the area smooth with the palm sander, you will be ready for varnishing. The 1st coat of varnish will bring out the grain and require another sanding when the varnish has fully dried. A little trick to avoid wasting varnish is to lightly dampen a cloth and rub it all over the sanded wooden surface, let it dry and then sand again. Do this 2-3 times and when you apply the varnish you will probably find you will only have to do it once. Here is an example of sandpaper grades, ranging from coarse to very fine.