

Architrave is the name given to the piece of wood that covers the gap between the door frame and the wall. Some architrave is very detailed and some is plain, all are cut and fastened in the same way.
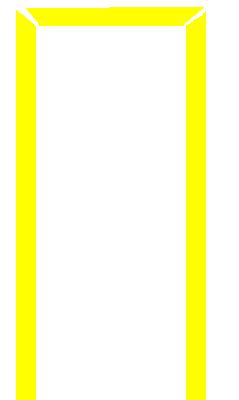
Here we have a door and frame that has been fitted into a wall opening, architrave will finish off the door.
Here the architrave is in yellow for clarity, this should be very simple as the door is square both of the corners will be 90 degrees and so the mitres will need cutting at 45 degrees (half of the original angle).

Normally architrave finishes at the floor but in some houses it finishes at the skirting board. Measure all the lengths making sure that the architrave sits about 5-10mm inside of the door casing ( you do not want it flush with the casing or it needs cutting around hinges etc.).
Mark the direction of the mitre on the architrave so that you do not get confused and cut it the wrong way (this is very easy to do)
IT IS ESSENTIAL THAT THE WORK IS HELD TIGHTLY DURING SAWING OR POOR JOINTS WILL RESULT!
It is a good idea to assemble the three pieces on the floor, although it is not critical, but a better picture framing quality mitre can be achieved this way.
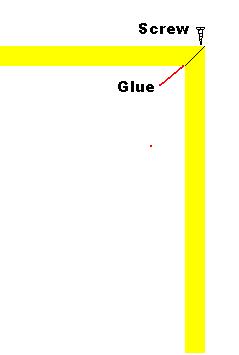
A suitable glue should be used to glue the pieces together, my favourite is mitre fast as it bonds in about 15 seconds.
Then the architrave should be screwed from above so that the screws cannot be seen.
Now simply position the whole thing over the door frame and fasten it by nailing it with several oval head nails, then knock in the nail heads with a nail punch and fill the holes if necessary.