

Tiling a kitchen splash back requires patience and can be a very time consuming job, but can be one of the most satisfying of DIY jobs if done correctly. This pages do not cover cutting or applying the tiles as this is covered in detail in other articles.

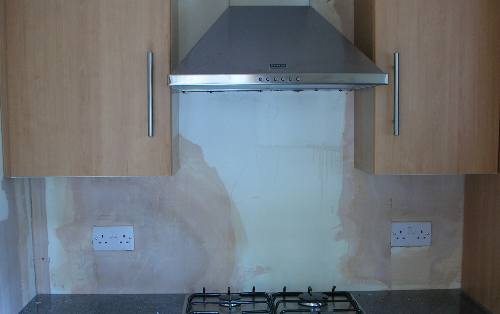
Here we are going to tile this kitchen splash back.
This is not a simple job and can be very time consuming if done correctly.
The first job is to remove the pelmet as it is easier to cut a few millimetres from the pelmet than it is to tile around it. The pelmet could be screwed either from underneath or above.
Remove the screws that are holding it and remove the pelmet and store it in a safe place.
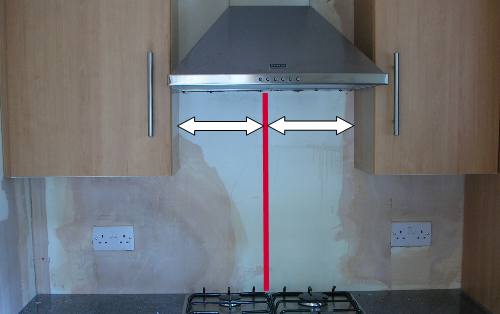
Now we need to find the centre of the area that we are tiling, this has been complicated slightly as one of the cupboards is 100mm wider than the other and so it will look better if we find the centre between these two cupboards rather than finding the centre at the worktop level. Draw a line down the centre using a spirit level, this is where we will start tiling from.

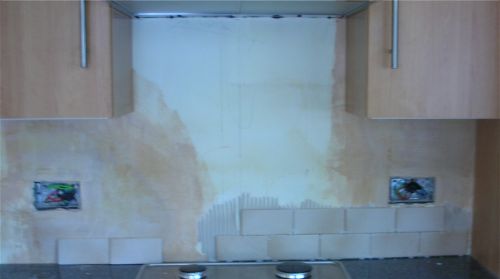
Rather than try and tile around the sockets it is much easier to remove them completely.
To do this isolate the electricity by switching off the main fuse on the consumer unit and remove the fuse for that circuit or lock off the MCB for that circuit.
Please see the page on Safe isolation procedures Then remove the sockets and tape up the ends of the wires to keep them clean. Do not switch the electricity back on until you have refitted the sockets correctly.
It is essential to leave an expansion gap all the way around the tiled area, this should be at least 4mm. This gap will be hidden by a bead of silicone after the tiles have been grouted.
PVA the surface only if the adhesive manufacturer recommends to do so.
The first row of tiles from the worktop has been placed on tile spacers so that there is a gap, this is will make things easier, should a new worktop ever be fitted. The gap will be sealed with silicone sealant later.
When tiling a kitchen splash back there is going to be some awkward cuts and so it is best if you only apply the adhesive to a small area at once, if not the adhesive will set before you finish tiling.

When tiling around the sockets it is necessary to leave a space that is the same size or slightly larger than the socket back box. If the space is too big the socket will not fit flush with the tiles and if the space is too small the socket may not fit. Longer socket screws may be required now that you have tiled around the back box, these are available from most DIY or electrical shops. The socket can be refitted before the adhesive has set but do not over tighten the screws.
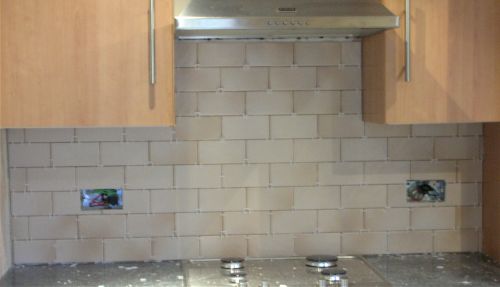
Here the whole splash back has been tiled, this will be grouted once the adhesive is fully set. Refer to your adhesive manufacturers instructions for drying times. After grouting you can replace the sockets and switch the electricity back on, if not done earlier. Cut a few millimetres off the pelmet to accommodate the new tiles and re-fit them

This is the finished splash back, with new sockets fitted. As you can see the whole tiled area has been sealed around with silicone sealant to cover the expansion gaps. For those of you with a keen eye the gap between the tiles and extractor canopy has been purposely left because it has only been fitted temporarily.