

Here we are installing a single hole wash basin and pedestal.
The first thing we need to do is to fit the taps to the new basin and this will depend on whether you have a single hole basin or twin hole basin.
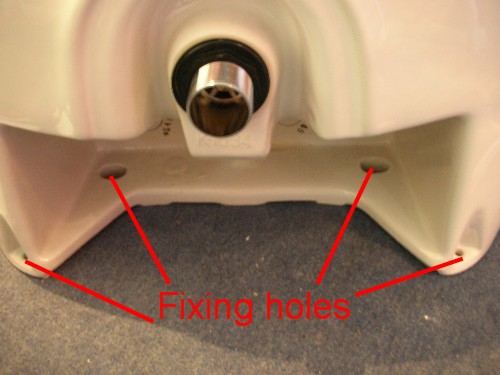
You can position your new basin onto the wall where it is going to be fitted and make all the necessary fixing holes before fitting the basin waste and taps, but it is much easier to fit the taps and waste before you fix the basin permanently to the wall. This is a large basin and is quite heavy, this will be seated onto a pedestal but still requires fixing to the wall. A basin like this is going to need some heavy duty fixings in order to take the weight of it, although the pedestal can be used to take much of the weight I still prefer to fix it properly so that the pedestal can be removed if needed. This basin has 4 fixing holes, which are identified here. The two large holes in the centre will be used in this instance and thru bolts will be used in these two holes. To fix the two smaller holes I will use some wall plugs and suitable screws.
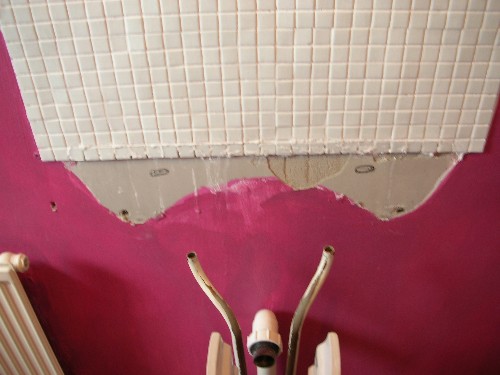
Here I have positioned the new pedestal and I have fitted the sink on top of the pedestal and marked the fixing holes with a pencil. When positioning the pedestal you can place some packers underneath it the same thickness of what the flooring material will be and then when you are fitting the flooring you can remove the pedestal and fit the flooring, without having to make any difficult cuts around the pedestal. Drill the holes using a correct sized drill bit and then you can reposition the basin.
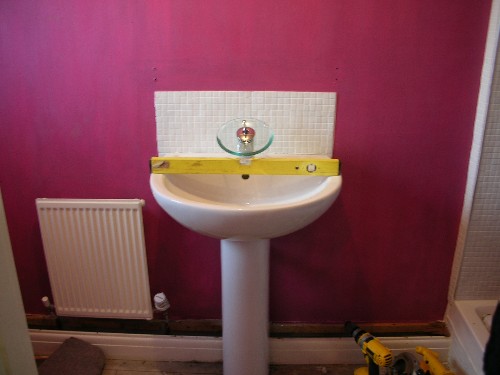
Use a spirit level to check that the basin is level and then fix it to the wall using suitable fixings. For a solid wall I would suggest using two thrubolts for the larger holes in the centre of the basin and then screws and wall plugs for the two smaller holes. For a thermalite or aircrete blocks then I would suggest using suitable plugs and screws, you will need some large stainless steel washers to be able to use screws for the two large centre fixings. On a hollow plasterboard wall I would suggest using snap toggles for the two large centre holes and redi drivers for the two smaller holes. If you were to fix a sink of this weight to a hollow wall without using a pedestal then you would have to fix the basin to noggins to hold the weight. On a lath and plaster wall you would have to either find a noggin to screw into or remove some of the lath and plaster and install noggins.

You will probably find that your existing trap will be the incorrect size for the new sink and so the easiest option is to use a telescopic trap. Waste traps in bathrooms are normally 32mm and are connected by a unifit compression fitting. A unifit compression fitting has a tapered washer inside that will grip either 32mm push fit pipe or 32mm solvent pipe ( strangely enough 32mm solvent and 32mm push fit pipes are not the same size) Connect the new waste to the waste pipe trap.
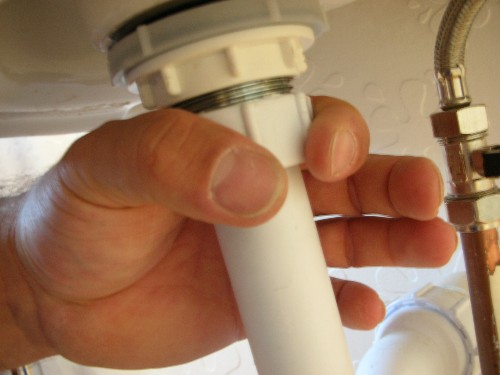
Compression waste fittings normally only need tightening by hand, ensure that all of the unions are tight!
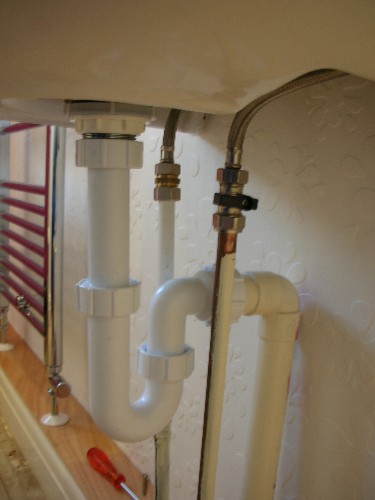
If isolation valves are not already fitted then you should fit them before connecting up the water supply. In some cases a non return valve (single check valve) will need fitting to the cold supply as some taps mix the hot and cold water in the tap and could potentially poison you if the hot water was to mix with the cold. This will only happen under extreme circumstances and with certain types of heating system. If in doubt ask your local building control officer. How to fit isolation valves You can now either reconnect the tap connecting nuts (if it was a like for like replacement) or you can use flexi tails to connect to the new tap. Cut the existing pipes to length as described in this section- cutting pipe and then connect up to the flexi tails.

Reposition the pedestal and fix it to the floor and you can place a bead of silicone between the basin and pedestal once you are confident that there are no leaks. You can now turn on the water slowly and check for leaks. Seal behind the basin with a good quality silicone. Using silicone sealant Enjoy your new basin!