Plastering a wall for the first time is never easy and getting a professional result is extremely difficult. Plastering takes a long time to master, although many people can pick it up easily and can skim walls with plaster in no time at all. Hopefully this page will help and provide some useful tips.
The final coat or top coat of plaster is probably the most important as it is the final coat that will be seen, this coat of plaster is often referred to as a skim. Skimming requires practice so don't dive straight in and plaster the living room, have a practice on a small upstairs room that is out of sight. If you mess it up you can go over it again or if you have discovered that you're not cut out for plastering you can call in a plasterer. You are not going to become a master plasterer by reading this page, although I have tried to include all that I can there is no substitute for practice!
There are certain rules that you must follow in order to get good results with skimming plaster-
- Firstly ensure that the surface is ready to be skimmed! Plasterboard or backing coat can be skimmed over with out preparing the surface. If you intend skimming over existing plaster or previously painted surfaces then a coat of diluted PVA bonding should be applied, if not the plaster will crack!
- Whenever you are mixing plaster ensure that all your buckets and tools are very clean! Any tiny pieces of old plaster can make plastering a nightmare.
- Always mix plaster by adding the water first, then slowly add the plaster and mix it well either with a wooden stick or mixer drill.
- If you are plastering a room ensure that you do not try and do two walls that are touching each other (like in a corner) or this will make it extremely difficult as you will damage one wall whilst plastering the other.
- There are two ways of applying the final coat of plaster, one method uses one coat of finishing plaster and the second method uses two coats of finishing plaster. For DIY use It will probably be easiest to use two coats instead of one, to do this simply apply the plaster as described below then apply another coat of plaster before the first coat has gone off, then wait for this coat to go off sufficiently before polishing it.
- Ensure that the room is kept cool, any radiators should be turned off or the plaster will dry out too quickly, making it difficult to apply and it may also crack when drying.

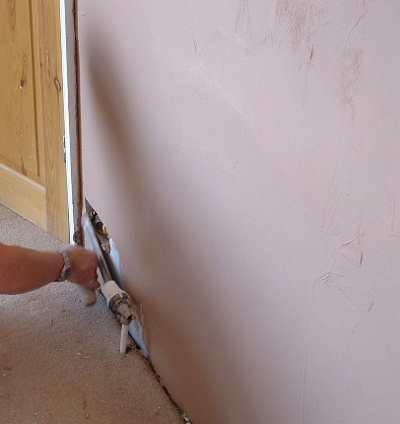
This is one of the walls in the room that is being skimmed with finishing plaster. All of the screws are sunk below the surface of the plasterboard and the joints have been taped with self adhesive scrim. Turn off the electricity, remove the sockets and tape up the wires. Do not turn the electricity back on until you have finished plastering. Wet plaster conducts electricity well and so could electrocute you.
Bare Plasterboard can be plastered straight onto and does not require any treatment. For previously plastered surfaces the wall will require coating with PVA.
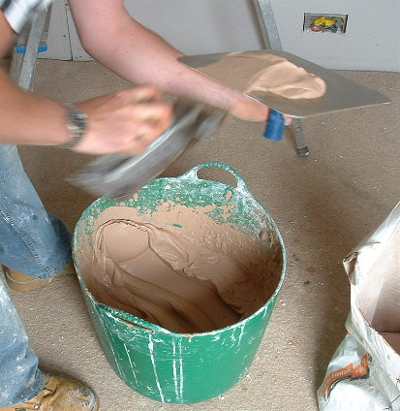
Start by loading the hawk with plaster, if the plaster is the correct consistency it will not fall off the hawk. You can use your float to load the hawk or a bucket trowel.
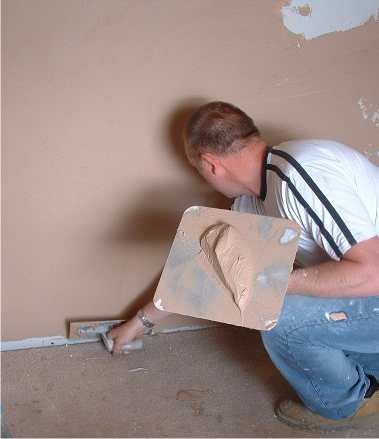
Spread the plaster using the float onto the wall ensuring that the blade of the float is on an angle, do not try and use a float flat as it will not work. The smaller the angle between the wall and the float without the blade falling flat, the better the finish will be! This takes practice and occasionally you will remove some plaster but practice makes perfect. We are aiming to cover the wall as fast as possible, but at this stage do not be too particular. Just get approximately 2mm of plaster spread all over the wall. .

Here you can see that the plaster is far from perfect, this is nothing at all to worry about as it will be flattened out soon. .
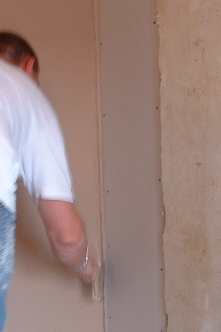
Once the wall has been covered go around and clean up the edges by wetting a large brush and removing any plaster that has spread onto any adjoining surfaces.
Allow the plaster to dry a little but not too much, this is where explaining it on a web page becomes difficult! Basically you don't want it too wet or too dry! 20 minutes on a cool day should be about right.
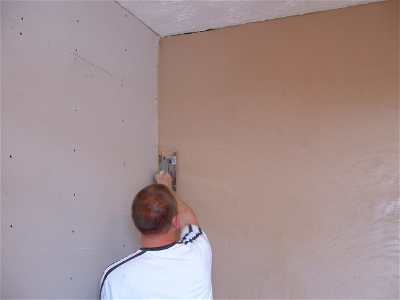
Now using your float at approximately the same angle of this picture trowel the plaster until it is flat and all the marks have been removed, so that the finish is smooth.
Any hollows or drags should be filled with some more plaster.
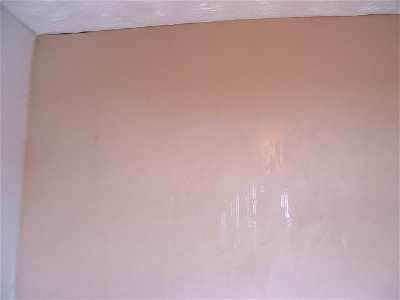
You can now relax a little, give the wall about 30-40 minutes ( only a rough guide - reduce in warm weather )and then you can polish the wall. This is done by wetting the wall, a good technique is to wet a paint brush and then splash the water onto the wall using the wet brush. Don't soak it wet through, you only need a few runs of water on the surface to lubricate the blade as you polish it.
When you have wet the wall you can polish the plaster by trowelling the whole surface. The angle of the blade should be as before so that it is on an angle to the wall. Try and go in both directions so that lines do not appear. You need to press relatively hard but not that hard that you drag the plaster off the wall. Leave the wall to dry and in a day or so it will have dried out fully.