Lath and plaster is a very old method used for plastering non load bearing petition walls. The stud work is the same as if plasterboard was going to be applied but instead hundreds of thin pieces of wood (laths) are nailed horizontally across the studs, then a layer of bonding plaster is applied and forced between the gaps in the laths, then a final coat of finishing plaster is applied.
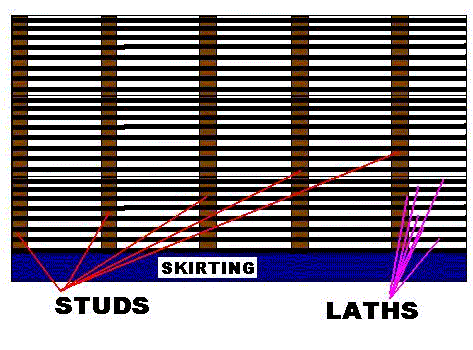
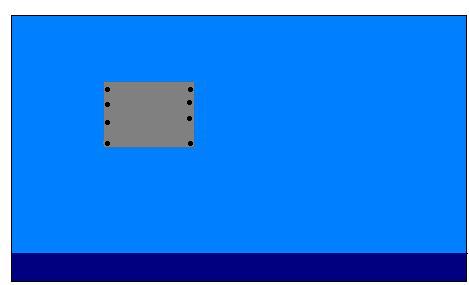
This is a diagram of what a Lath and plaster wall would look like if the plaster was missing.
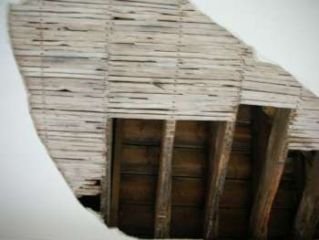
This lath & Plaster ceiling is badly damaged and will be over boarded, then plastered.
Once lath and plaster becomes so damaged it is often not viable to repair it as plaster could be come detached from the laths in another area. Cutting the area square and fixing plasterboard to the area, then over boarding the entire ceiling is probably the best option
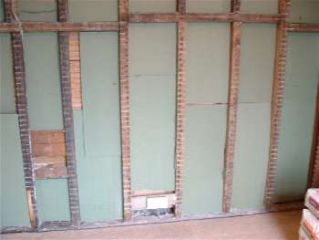
This lath and plaster wall was so badly damaged that the laths and plaster were removed, the wall will now be plaster boarded.
If the plaster has become badly detached from the laths it is necessary to remove the offending piece by knocking it off carefully.

This diagram shows light damage that can easily be "patch" repaired, for large areas it is best to remove all of the plaster and the laths and re-plaster board the wall. You can plaster board directly over the old laths but this will mean that the skirting boards will need removing and then replacing!
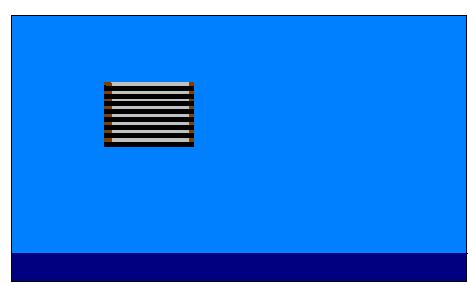
To patch repair a wall it is a good idea to knock the plaster off in a square section, work sideways until you reach a stud in both directions and make the hole as square as possible.
Measure the depth of the original plaster and get a piece of plasterboard slightly thinner than the original plaster, cut it to the size of the hole that you have just made.
Dab either some dry wall adhesive or grab adhesive on the reverse and push it into the hole, then screw the plasterboard to the studs using bugle head plasterboard screws. Dry Wall Screws
Leave it until the adhesive has gone off and then skim over the area with finishing plaster. Plaster skimming