Plastering a wall with backing plaster such as bonding or browning plaster is never easy as it is difficult to get it level. Today plasterboard is normally used as it is far easier!
The best way to ensure that you have the correct depth of plaster across a whole wall is by temporarily attaching wooden battens on the wall, by doing this you can divide the wall into sections or bays. These battens are known as grounds and should be fastened to the wall ensuring that they are level. Use a spirit level to level each batten and make sure it is perfectly level, once you have plastered in between both of the grounds you can reposition one of the grounds to make another bay, repeat this process until the whole wall is plastered to the correct depth. You might also want to read about Plaster types and Mixing plaster

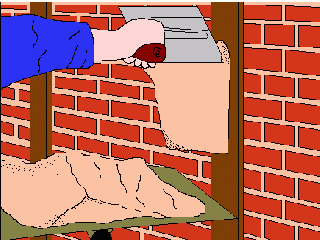
Fasten and level two battens (grounds) on the wall, spaced so that they are spaced close enough together, then another batten or a feather edge can be used to remove any excess plaster from between the grounds. Start by applying some plaster by keeping the blade of the float on the wooden batten, push upwards and spread the plaster on to the wall.

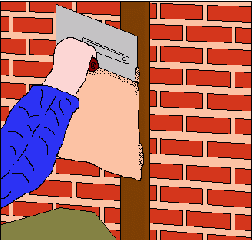
Make sure the blade is kept on the wooden batten, reducing the angle as you push the float up the batten. Finish by pressing the float in as to push the plaster into the wall.

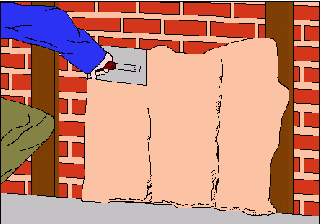
If you are plastering a ground floor be sure to leave a gap of at least 2 inches between the plaster and the floor, upstairs rooms can be plastered to the floor but this can make it difficult to lift the floorboards. Starting in the right hand corner work steadily by applying the plaster to the wall and be sure to press it firmly against the wall. Continue this process until you have filled the bay completely.

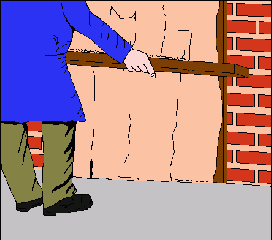
Using a straight batten, a plasterers Darby or a featheredge, level the plaster by moving the straight edge upwards with a sawing motion, this will level the wall. Fill any low spots with plaster and then repeat the process until the bay is completely flat.
Now that the wall is flat we need to ensure that the finishing plaster that is to be applied later will stick correctly, this is done by Keying the surface! The plaster sticks far better to a rough surface. We key the surface using a devilling float, which is a wooden float with nails knocked in it, lightly scrape this across the surface and it will score the plaster, ensuring that the coat of finishing plaster adheres correctly. Move the right hand ground and continue the process until the wall is finished.
For instructions on how to skim with finishing plaster please see here- Plaster skimming


