

If you have a flat roof on a part of your property they often are susceptible to problems and so it is now common practice to convert a flat roof into a pitched roof. This guide has been submitted by one of the sites members and so it should help to understand what is involved.

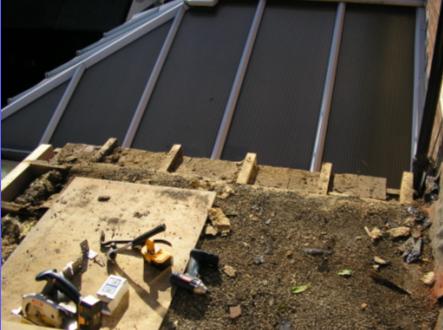
This shows the Existing extension fitted with a flat roof which was probably in excess of 20 years old.

Minor repairs had been made over the last 3 or 4 years to repair rotten chipboard. In the end, most of the front view of the roof had rotted away which resembled the bottom of a rabbit’s cage!
Rainwater was ultimately seeping into the living space below.

This is the intended design with measurements and materials used-
The First task was to remove the existing guttering and fascia boards with a wrecking bar. As the roof area was rotting away care must be taken on where you tread – it is safer to step on the area where the existing joists are.
Rear Wall Plate

Calculate the required height for the wall plate based on what is to sit on top of it i.e truss (minus birdsmouth cuts), laths and tiles. Also allowing for cutting in the lead flashing at one brick below the window sill.
A half brick on the side wall was knocked out (red arrow) to allow the wall plate to be pushed through giving it extra support. This was then re-pointed once the wall plate was in position. Marks were chalked on the wall for the spacing for bolts, making sure the holes in the brick would be in the centre of the brick.
These marks were transferred to the wall plate. Holes were drilled through the wall plate including counter sinking to allow for extra washers and access with a spanner/socket set. Offered up wall plate against wall and marked hole positions on the wall. Drilled holes to the exact depth of the barrel of the bolt. Placed bolt into holes and positioned the wall plate into knocked out hole on the side wall and manoeuvred the wall plate against the wall so that the shaft of the bolts that are in the wall went through the holes in the wall plate. Added oversized washers and tightened up the bolt making sure that the wall plate was completely level.
Front Wall Plate
Remove existing felt and roofing board to reveal the existing joists. Cut back the joist to allow fixing of front wall plate so that the front wall plate fits flush with the external front wall. This wall plate will sit on the first skin brick work. Line up wall plate against existing joists and make a mark on the wall plate in line with the centre of the joists. Drill holes at these marks to allow a 6” nail to be driven through the wall plate into the joists.
Lay a thick layer of cement on existing brick work then place the wall plate on this and get a good level. Using drilled holes sink 6” nails though wall plate into joists. This was also secured with ‘L’ brackets on each rafter.
Rafters
Once the two wall plates are in place work can begin on installing the rafters. Firstly, each rafter should be placed on the front and rear wall plates making sure it is pushed up tight against the rear wall. Mark a vertical line, parallel with the wall (in blue) on the rafter and then cut along this line. This will then allow the rafter to sit flush against the rear wall.

Once the rafter end is cut then birdsmouths can be cut into the rafter to allow it to sit securely onto the wall plates. To do this put the rafter back onto the front and rear wall plates and flush up to the rear wall. For the birdsmouth on the rear wall draw a vertical line (in Red) on the rafter using the front of the wall plate as a guide.
Then draw a horizontal line 90° to the vertical line from the vertical line to the wall. The height of this line must not be too high up as to weaken the point where the rafter sits on the wall plate and must be the same on both cuts on the rafter. Use a suitably thick piece of wood to provide a template (I used an off cut from rafter).
Repeat this process for the front birdsmouth but use the outside face of the wall plate as the guide for the vertical line then draw a horizontal line from this line inwards at the same height as the horizontal line for the previous cut.
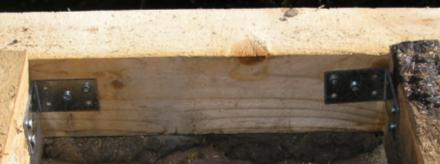
Put the rafters into position and then drill a hole through the top of the rafter in line with the middle of the wall plate (see red arrow above). Then knock a 6” nail down through the hole and securely into the wall plate. Also sidespike 4” ovals into either side of the rafter, again into the top of the wall plate (blue arrow above). This process needs repeating at both ends of the rafter.
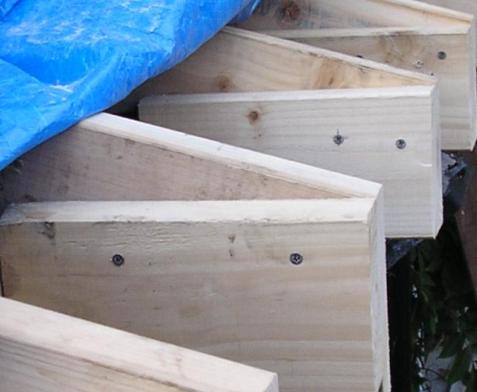
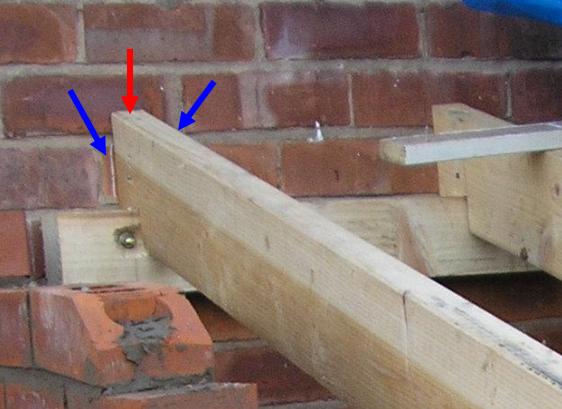
The ends of the rafters were to be cut slightly longer (based on the width of the soffit) to provide an over hang. A return was used to provide a fixing point for the soffit. These returns were screwed to the inside of the overhanging rafter so that the return formed a right angle to the brick wall.

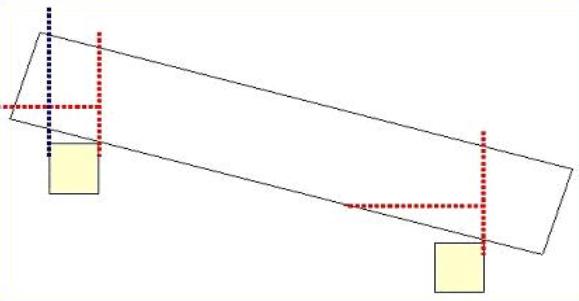
A plumb line was stretched from the first rafter to the last at the point where the rafter and return were to be cut. By dropping the plumb line down the side of the rafter/return a line could be drawn to produce a vertical cut. Once this was done on each rafter both the rafter and return was cut to square off the ends.
Gable End

The gable end was bricked up using screw ties to link in with the existing wall and ordinary wall ties to join the brick and bocks that made up the two skins of the wall. The bricks were cut to the appropriate angle so that they were just below the level of the rafters. The slope was then smoothed out using mortar and under cloak strips applied on top of that to provide a flat surface. The under cloak slightly overlapped the edge of the bricks. To secure the strips even more holes were drilled to coincide with the holes in the bricks and a screw was screwed into the wet cement
Roof Covering

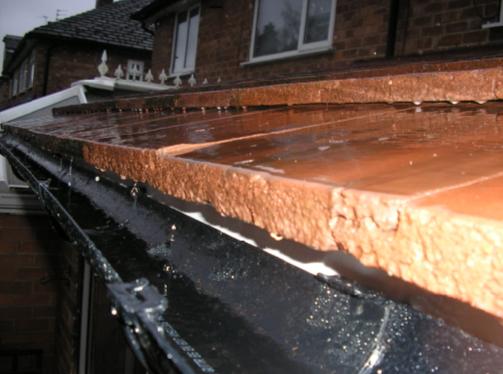
Once the gable end was made up and the rafters were in position and cut to the right size focus can change to the actual covering of the roof itself. The tiles will rest on battens therefore the first batten at the front of the roof needs to be situated so the first tile is sufficiently overhanging the roof so that rain can run off into the gutter. Consideration needs to be made on the force that the water will run off when working out the required overhang. Each of the rows of tiles overlaps the one below it. This will form the gap required between each row of batten. It is useful to cut a few lengths of batten to this gap to use then as spacers. The total width of the roof was measured and then an overhang was added. This measurement was used to cut several lengths of the breathable membrane. These are laid widthways along the roof taking note of the manufacturers’ instructions on overlap. These are secured in place using the battens which in turn are secured using nails into the rafters.
Roof Tiles
Once the membrane and battens are secured in place the tiles can be added. It is worth taking the time to workout the layout of the tiles so that you can reduce the number of tiles you need to cut and also to position the tiles in such a way that you don’t end up with small cuts of tiles. The tiles simply reset on the battens and for added security they can be nailed into the battens. It is advisable for the first row and the top row and alternating ones in between to be nailed down.
Fascia and Soffit
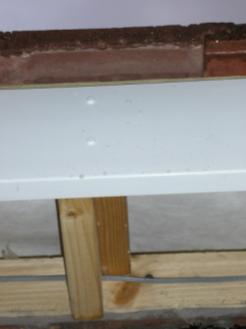
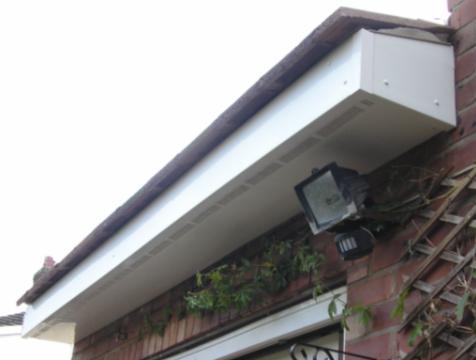
The soffit was to be fitted with downlights (IP6n) so before the fascia and soffit were completed cable was installed. Suitable holes were drilled through the returns and the cable was threaded through allowing for some slack. Once the soffit was installed the holes for the lights were drilled through the soffit using a hole saw and the cable pulled through to install the lights.
For the fascia measure the width from the outside of the first rafter to the last rafter and cut the fascia to this measurement. Mark off where the first and last rafter is on the fascia and drill a couple of pilot holes. Hold up the fascia board to the squared off rafters/returns at the right level allowing for the soffit to be fitted below and lightly pin the board. Move to the other end and repeat the process until the fascia is perfectly level. Secure the fascia board with 4” pollypins but don’t drive them all the way is as it could distort the look of the board.
A soffit is added to this roof which is why the rafters overhang the front of the roof. Cut the soffit to the required length and then slide in the soffit where it meets the fascia board and then push up the soffit so it fits flush to the wall. Again secure using pollypins. Make up the ends and finish off with corners to hide the joins.
Guttering
Measure the width of the actual roof from edge of tile at one end to the edge of the other. Add 4inches for an overall overhang at the ends. Cut the guttering to the required length bearing in mind any accessories that need to be added like end stops, outlets and joining brackets. Position the brackets so that the guttering will be no more than 1inch lower than the underneath of the roof tiles. Secure the first bracket at the far end and then secure a plum line and stretch it out to the other and mark out the level point. A fall of a maximum of 3mm per metre length needs to be maintained so adjust the level point according to this. Re-adjust the plumb line and mark off the positions for the other brackets based on the level of the plumb line. Brackets should be position no more than at 1metre intervals. They also need to be positioned where the rafter/returns are to have a secure fixing point. Once the brackets are in place the guttering can be added including the relevant accessories like end stops etc.
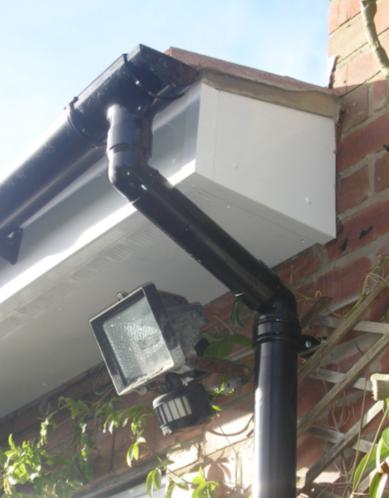
Fitting the downpipe is a matter of fitting together various accessories to move the rain water from the outlet to the drain. This may be as simple as adding a length of downpipe and securing this to the wall using brackets at no more than 2 metre intervals. It may involve putting together several bends and offsets to route the water around obstacles and to the drain.
If everything is right the rain should just drip into the guttering when light rain is falling or, under extreme rain, the water shouldn’t flow over the edge of the guttering.
Finishing Off

Point any area of the tiles where the edges are exposed. This is a simple matter of pushing a deep bed of mortar. This will sit on the under cloak. (yes the brickwork isn’t great!). Lead flashing should be added where the roof meets the wall(s) but this has not yet been completed. Where the membrane rolls up from underneath the tiles and up the walls these were siliconed using a lead silicone to make it waterproof before lead work is completed.
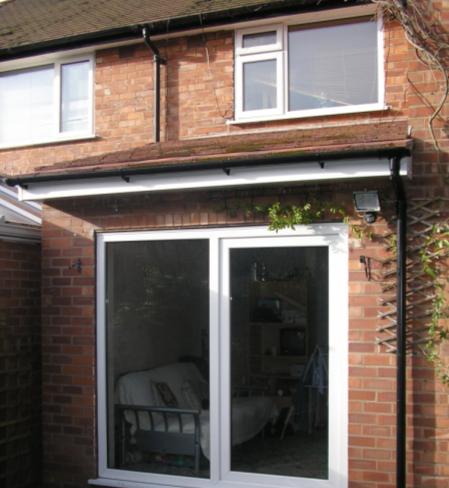
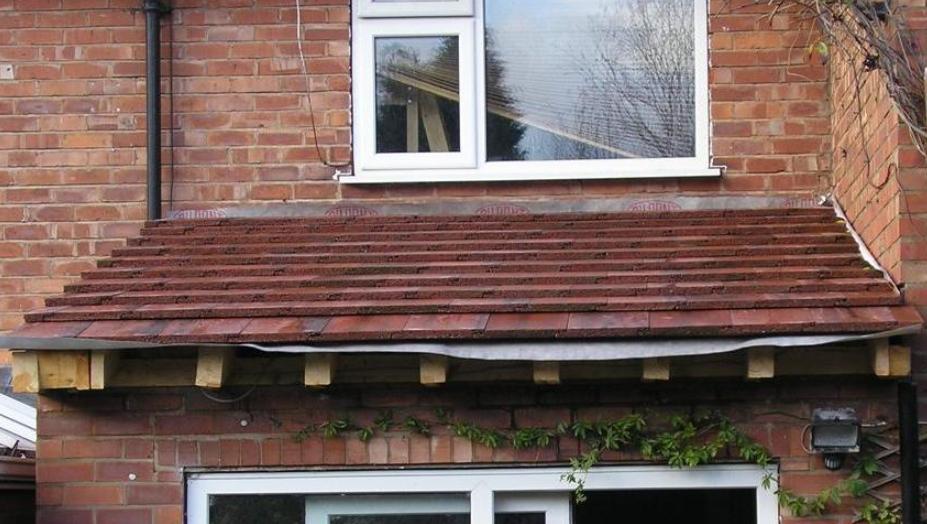
This is the completed roof with facia, soffit and guttering in place. The only exception is for the lead
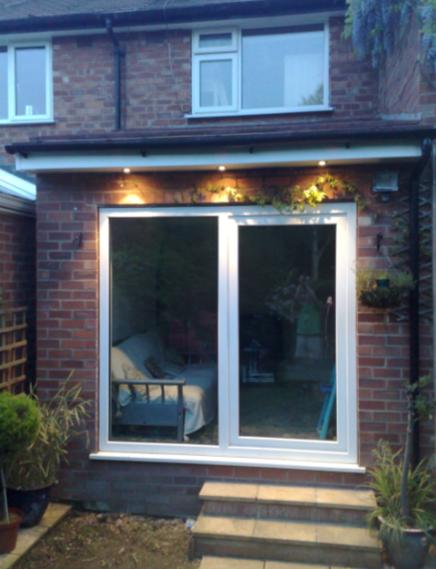
And with the lights on!