 |
fitting an outside tap |
An Outside tap is very useful, with the cheap availability of Pressure washers Outside taps have become very common place.
Fitting a outside tap is not difficult, there is only one pipe to connect to and Normally three screws which hold the back plate to the wall.
The tap needs locating in a suitable location preferably above a drain so that the water can drain away from the property.
You basically have two choices here-
| 1.purchase an off the shelf kit which comprises of a outside tap, a self cutting tap for inside which clamps to your existing cold water pipe and a flexible hose which connects the two taps together. |
|---|
 |
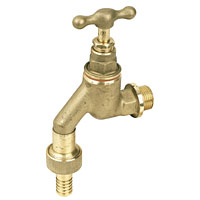
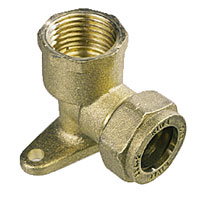
| 2. Purchase a back plate and outside tap ( often called a bib tap) enough pipe to reach from your existing water supply to the tap and the required amount of joints, copper pipe is probably best as it looks far better than plastic, But plastic pipe is easier to work with. |
|---|
  |
Both methods of fitting a outside tap are very similar, with the special kit you will get a self cutting tap and by purchasing the individual items you will need to tee into the existing supply.
Start by drilling a hole through the wall big enough for a piece of 15mm pipe to pass through, it is best to drill with a small diameter bit first all the way through the wall then drill in from each side with a larger drill bit.
Push a length of 15mm copper pipe through the wall and cut another piece of pipe long enough to reach from the pipe shoved through the wall to the approximate position of the Bib tap. Join these two pieces together using a elbow, now fasten the Back Plate on to the open piece of pipe, if you are using a compression joint put some PTFE tape around the thread.
Push the back plate against the wall and mark the position of the drill holes, this is easy as the pipe will turn 360 degrees as the pipe is not yet connected inside! Turn the back plate and attached pipe then it is not in your way and drill the three holes, plug the holes and fasten the back plate to the wall with either brass or stainless steel screws as normal screws will rust outside.
Put plenty of PTFE tape around the thread on the Bib Tap and screw it into the Back Plate, hold the back plate with a pair of water pump pliers and screw the tap home.
The Water Regulations should be checked as to what is required before you fit your new tap. Currently you require an isolation valve, a double check valve and a drain cock on the inside of the property. To fit these three components is relatively easy and is similar to fitting an isolation valve- |
|---|
Now you can go inside the property and cut the length of pipe to the desired length, after doing this isolate the water supply then open the cold taps in the house to drain any excess water from the system. You are now ready to cut into the water pipe, use only push fit or compression connectors as solder does not like wet pipes!
After fitting the appropriate T piece you need a length of pipe long enough to reach from the T piece to the new pipe which leads outside for the new bib tap. Connect these pipes together using a elbow. Slowly turn the water back on and check for leaks, if any leaks are present tighten joints.
| How to use compression fittings |
|---|
| How to Use push fit fittings |
|---|
|
|
|
|---|