

How to install a central heating radiator
Central heating radiators can be installed in almost any room of the house and make a welcome addition. If fitting a radiator that is plumbed in to the central heating system in a conservatory, planning permission is normally required! Radiators are often positioned underneath windows, this is so that the warm air from the radiator meets the cold air from the window, which is then circulated around the room.
Adding a extra radiator to an existing central heating system is relatively straight forwards and can easily be completed in a few hours.
Firstly decide where the new radiator is to be positioned, then find a radiator that is near by or lift the floorboards and check under the floor to see if any central heating pipes are near. Central heating is not as complex as it first seems, there are basically two pipes, flow and return, Some older systems only have one pipe which is both the flow and return.
SINGLE PIPE SYSTEM
The flow pipe carries the heated water from the boiler to the radiators and the return pipe returns the water to the boiler to be heated again.

TWIN PIPE SYSTEM
Often a large central heating pipe will attach to a manifold which will have several smaller diameter pipes, this saves considerable time and makes fitting central heating far easier. A twin pipe system is far more efficient than a single pipe system.
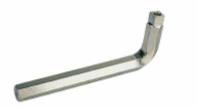
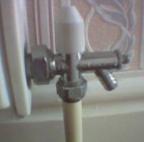
The first thing to do with your new radiator is to fix the radiator tails, These are the screw in fittings that normally come with the lockshield or thermostatic radiator valves. PTFE tape should be wrapped around the thread before screwing it into the radiator. Most tails tighten with a radiator spanner, although some can be tightened with a normal spanner of the correct size.
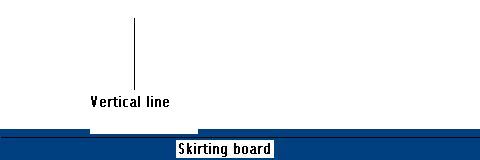
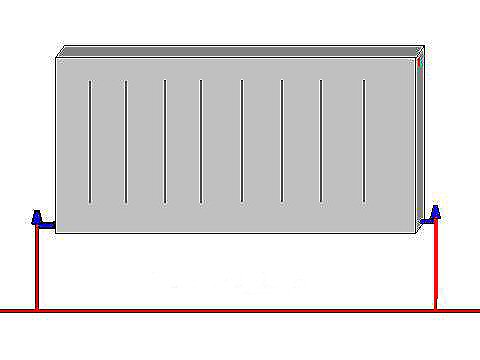
Once a new position has been decide for your new radiator you can fasten it to the wall using a suitable fixing. To fasten a radiator to a wall simply measure the gap between the 2 fastening points on the reverse of the radiator, draw a straight vertical line on the wall using a spirit level-
Then Draw another line the correct distance apart for the radiator brackets

Fasten the brackets to the wall using the correct fasteners
Lift the radiator onto the brackets ensuring that it is correctly located
Now you must ensure that the central heating is switched off!
Look at the downstairs radiators and you should find a drain off valve like this one
How to drain down a central heating system video
You will need a length of hosepipe long enough to reach outside of the property as one side of the hose needs attaching to the drain off valve and securing with a jubilee clip. Run the other end of the hose pipe to the drain outside, ensuring that the pipe is as straight as possible and that it is not kinked. If you have a heating system that never needs topping up manually, then you are going to have to isolate the water feeding the central heating system. This can be done by either turning off the main supply to the property or finding the header tank and isolating the supply to it. Using an adjustable spanner open the square on the drain off valve, water should flow out of the hosepipe! When you are certain that the system is draining suitably, open a bleed valve on a upstairs radiator. Do Not cut into any pipes until the system is completely empty!
You can now cut into the pipes that you intended to take a branch from using the appropriate cutter (pipe slice for copper, Plastic pipe cutters for plastic), there could still be a little water in the pipe so have a suitable container to catch the water in. You will need to cut a little more from one of the pipes in order to insert the "T" fitting
Whether you use plastic pipe or copper you will have to use either push fit fittings or compression fittings, solder fittings will not work due to the water. I prefer plastic so will assume that you are also using plastic, if you are using copper you will possibly need a pipe bender or pipe bending spring. After inserting the "T" fitting, run the pipe from both the flow and return to the new radiator, the flow should have the thermostatic valve on or the lockshield with the open close function working, this is simply a matter of using the correct cap for the valve. The return valve has a cap on that will neither open or close the valve as it spins freely.
Pipe up the new radiator from the flow and return pipes that you have Teed into and ensure that pipe inserts are used. If you are using compression valves for the radiator ensure that the olives are made of copper not brass as brass olives are too hard for some plastic pipe. Close the drain off valve using an adjustable spanner and remove the hosepipe. Re- tighten the bleed valve that you opened earlier and refill the system slowly. This will vary depending on what system you have! Check for leaks and slowly allow the central heating system to be filled. Bleed all the radiators in the system and keep checking for leaks, if a leak is found tighten the nuts or if it is pushfit ensure that the pipes are pushed all the way into the fitting.
Turn the central heating on and enjoy your new radiator!